Showing posts with label 3D projects. Show all posts

Tuesday, October 13, 2015

Thanksgiving Featuring Sunny Studio Stamps

Hello everybody! welcome back to Crafty Time 4U, I hope your week started with the right foot! Today I'm at the Sunny Studio blog, sharing with you some some inspiration for your Thanksgiving dinner table. I made place cards and silverware pockets for the Thanksgiving table using the adorable "Harvest Happiness" stamp set.
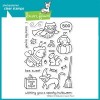
Using the partial die cut technique I created this place cards for my Thanksgiving table, I just love those cute images from the Harvest Happiness stamp set. The Indian owl is favorite, that's what I chose it for my place card, and my son chose the turkey, so my husband will get the pilgrim. I stamped the leaves from the same stamp set and colored them with Copic markers.  Finally I adhered the letters to form the names from a die cut set that I have on hand. 

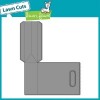
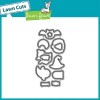
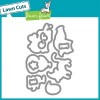
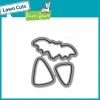
For these silverware pockets I used more images from the "Happy Harvest" stamp set and its coordinated dies with some leaves that come in the "Happy Harvest" coordinated die set. I love these added bonus dies.  They make cute little add-ons for your projects. 

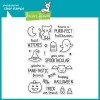
It is very easy to make Thanksgiving projects using the Harvest Happiness stamp set, you could even have your kids help you! Your table will be so friendly and sweet for your Thanksgiving dinner. 

I hope you enjoyed today's inspiration, visit the Sunny Studio Stamp blog for more details and inspiration using the Harvest Happiness stamp set, and don't forget to tag your projects in social media using the #SunnyStudioStamps so so you could be feature on our Sunny Saturday Share. Have a lovely day!

Thanks so much for stopping by, I'll see you soon with more Crafty Time 4U! 

Monday, October 12, 2015

Halloween Goody Bags Featuring Lawn Fawn

Hello everybody, welcome back to Crafty Time 4U! I hoped you had a super nice weekend! Last Saturday I was at the Marker POP blog sharing with you some these Halloween inspiration using some Lawn Fawn stamps and dies! These goodie bags are sure to delight kids or even grownups, fill them up with your favorite candy and hand out some Halloween joy!
I created individual scenes on each goody bag, let me show you and I will tell you a little more about them.

For this goodie bags I used multiple Halloween and some non-Halloween Lawn Fawn products. I cut the goodie bags from cardstock and I used some of the little stars from the “spooktacular” stamp set to heat emboss a starry sky. Then I stamped and die cut some images from the “trick or treat,” “hoppy Halloween,” “Critters in costume” and “spooktacular,” and arranged the scenes on the front panel of the goodie bags.
 DSC_8066 DSC_8065
DSC_8063I cut the clouds from cardstock, using the clouds from the "spring showers" stand along die by Lawn Fawn and I also created a hill from cardstock using "twisted citron" and "crushed olive" Distress inks. The "happy halloween" sentiment that I used is from "hats off you" stamp set and I heat embossed with white embossing powder and attache to the goodie bag using coordinated tiny clothe's pins. 

I hope you really enjoyed these goodie bags and that you got inspired to create fun gifts for your family and friends this Halloween.

Supplies:
Thanks so much for stopping by, I'll see you soon with more Crafty Time 4U!


Wednesday, September 23, 2015

Trick or Treat!

 Hello everybody, welcome back to Crafty Time 4U! Today I am sharing with you some milk carton treats, using Lawn Fawn products. As Halloween approaches, we have to start working on our gifts and treats we will have for the kids, teachers or coworkers. So here is an quick an easy idea that I wanted to share with you. Let me show you and I will tell you a little bit more about it.

DSC_7997
I die cut the"Milk carton Lawncuts" using patterned paper from the "Let's polka in the dark collection." I also die cut some grass with the "grassy border" die  out of some green card stock, and  some clouds borders out of black card stock, using the "stitched puffy clouds border dies." 

DSC_7989 MpopI used the smallest one of the "Stitched circle tags" to stamp the sentiment or message "trick or treat" from the "critters in costume" stamp set, and I heat embossed it. I punched two small holes on the flaps on the milk carton and attache the circle tag using baker's twine.

DSC_7995I stamp, colored, and die cut  the critters and accessories from the "party animal" and "holiday party animal" and adhered to the assembled milk cartons, using foam adhesive 

I hope you enjoyed this project and that you'll give it a try. I promise you, they are very easy to put together, very quick project on which kids can help too, by coloring the images, that would make it much more fun!
Have a great rest of the week!

Supplies:
Thanks so much for stopping by, I'll see you soon with more Crafty Time 4U!